
Today is Pie Day across the web, a community baking celebration that began when a group of bloggers challenged one another to bake and post pies on the same day. They enjoyed it so much they made it an annual event and welcomed anyone who wanted to join.
Pies have an intimidating reputation, but they aren’t as difficult as many think. I started making pies as a teenager and, while practice helps, a good pie is within reach for any home baker. I’ll share practical tips that make the process straightforward and rewarding.
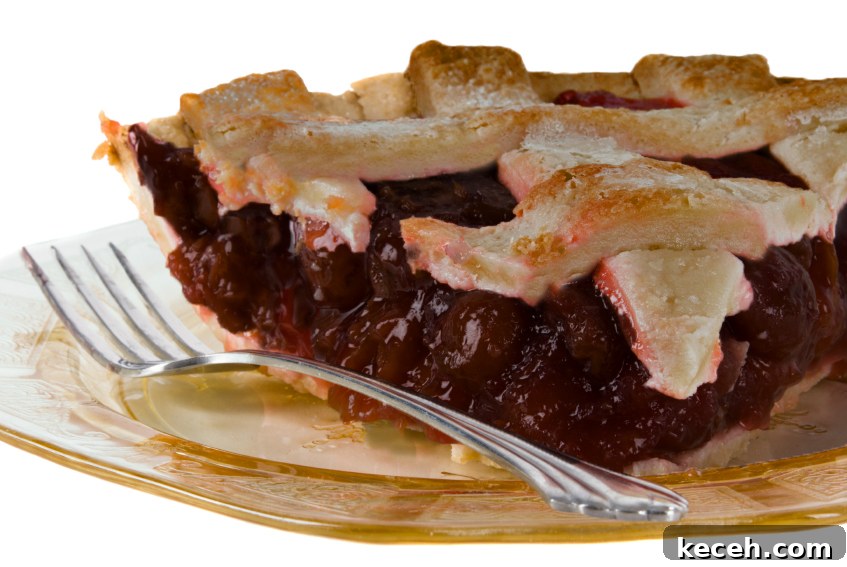
My go-to pie outside of Thanksgiving classics is cherry pie. It’s a family favorite—my brothers request it whenever they come to dinner—and it’s easy to make year-round using jarred sour cherries. I prefer a brand called Zergut and sometimes add macerated cranberries for extra holiday brightness, though they can be omitted for a pure cherry pie.
The part that scares most people is the crust, but there are three basic rules to remember:
1. Chill all ingredients beforehand.
2. Leave visible, larger pieces of butter for flakiness.
3. Gluten forms when liquid is added, so once you add liquid, handle the dough as little as possible to keep the crust tender.
Those basics will get you a good crust. Additional techniques can refine results, but these three will prevent the most common problems.

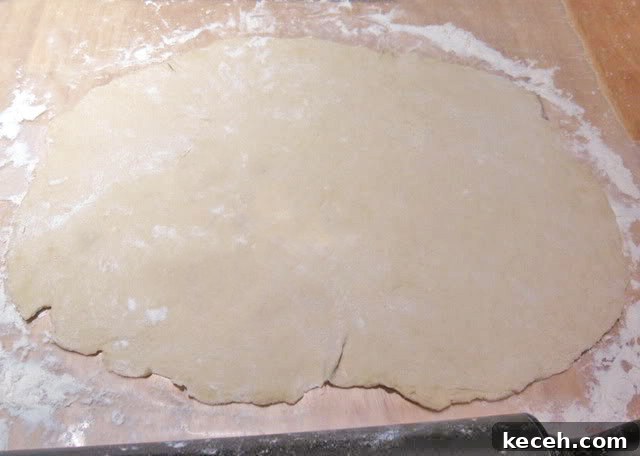
Rolling the dough onto the pin before transferring it to the pie pan
There’s an ongoing debate between vegetable shortening and all-butter crusts. I favor butter for its flavor; shortening can add extra flakiness but tastes flat. A splash of vinegar in the dough can boost flakiness without altering flavor, which is my workaround for skipping shortening. For competitions, I sometimes use a 50/50 blend of butter and shortening to combine flavor and texture. Choose the approach you prefer.

Bottom crust set into pie plate
Over time I’ve refined my pie dough technique. Key extra tips: follow a reliable recipe, don’t overwork dough after adding liquid, use just enough liquid to hydrate the dry bits, chill the dough before rolling, dust generously with flour and brush off any excess before placing it in the pan. These small steps add up to a better crust.
The filling is the other half of a great pie. For years I battled fillings that were gluey, didn’t thicken, or turned cloudy. When I prepared pies for a county fair I investigated why fillings fail. The most reliable method is to thicken fruit juices first, then add the fruit. That simple change prevents runny or separated fillings and produces consistently clear, thick results.
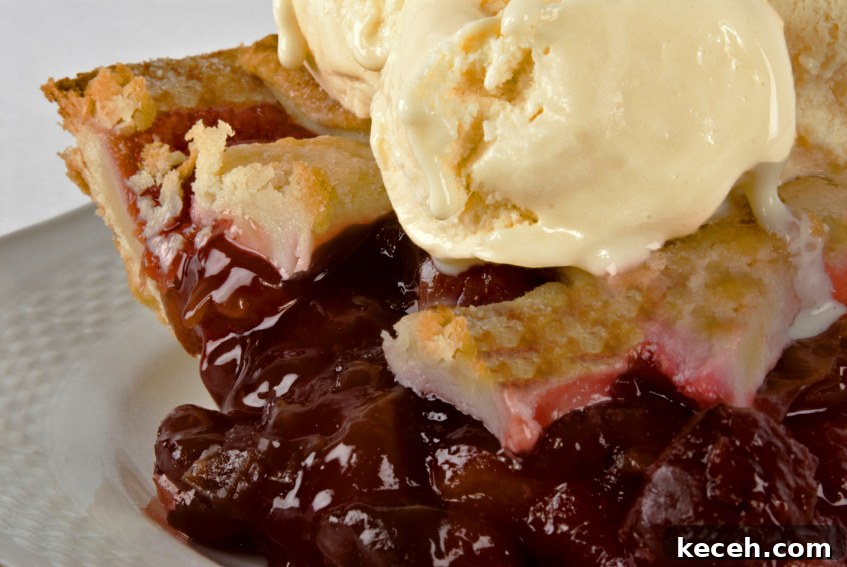
Cherry Pie a la Mode
Cherry pie is traditionally served a la mode with a scoop of vanilla ice cream. Warming the pie slightly before adding ice cream lets it melt into a delicious sauce. If you make ice cream from scratch, the combination is especially memorable.
Pie Day is a fun reason to try baking or to revisit a classic. With a few basic techniques and a good recipe, anyone can bake a lovely pie. Give it a try—you’ll be surprised how satisfying it is to share a homemade pie.
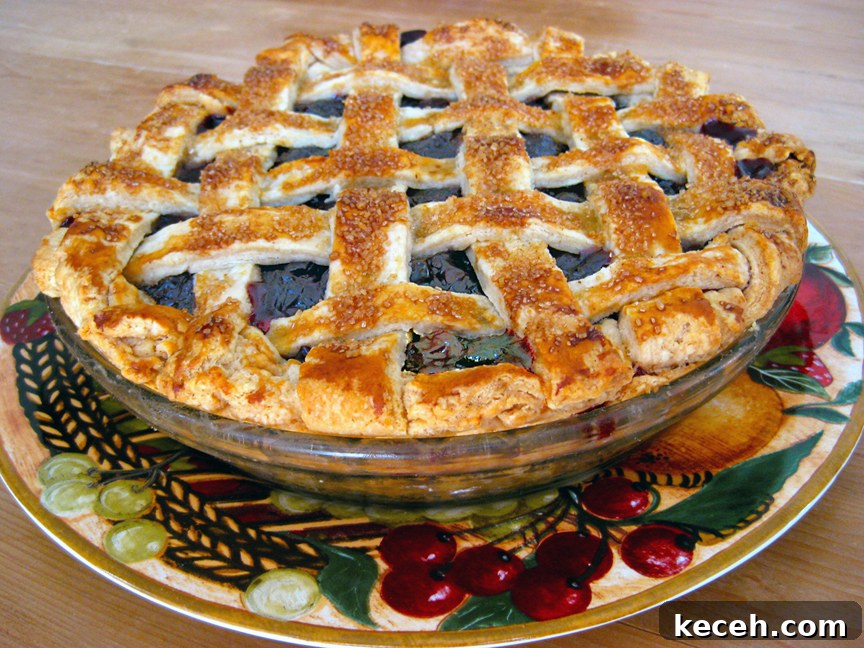
Kitchen Skill: How to Weave a Lattice Crust
To size a lattice, flip a pie plate upside down on parchment and trace a circle on the back. Turn the paper over and use the circle as a guide for your lattice size.
A lattice is best learned through step-by-step photos. If you have a tutorial to follow, use it as you weave. The basic concept is alternating over and under, similar to basket weaving.
Roll your top crust and cut strips about 1/2 to 3/4 inch wide. Arrange 5 to 7 parallel strips (or as many as you need) over the parchment, placing the longest in the center and shorter ones toward the edges. Weave half the lattice at a time.
Fold every other strip back and lay a perpendicular strip across the folded edges. Unfold to cover the strip. Next, fold back the strips that run underneath and place another perpendicular strip. Repeat until one side is finished, then rotate and repeat on the other side.
Once woven, even out the spacing and correct any mistakes while the lattice is on the parchment—it’s easier than working directly on the pie. Press intersections together, flip the woven lattice onto the filled pie, trim the excess, flute the edges, and brush with egg wash for a glossy, golden finish. Sprinkle coarse sugar if you like a sweet crunch.


- Egg Wash and Crust
- 1 large egg
- 2 tbsp milk
- 1 (9-inch) double crust pie dough recipe, chilled (recipe below)
- Filling
- Light or dark rum, optional
- 2 cups dried cranberries (leave out if you prefer)
- 3 (24-oz) jars sour cherries in juice (NOT pie filling), well drained, juices reserved
- 1 cup sugar
- 4 tbsp cornstarch
- 1 tbsp all-purpose flour
- Pinch of salt
- 1/2 tsp vanilla
- 1 to 2 tsp fresh lemon juice, to taste
- Demerara or other coarse sugar, optional
- Move oven rack to the lowest position and place a foil-lined baking sheet on it. Preheat oven to 400°F. Make pie dough and chill while you prepare the filling.
- Egg Wash: Beat egg and milk together until smooth. Set aside.
- Prepare the Crust: Roll chilled dough and line a pie plate, leaving a 1-inch overhang. Cut lattice strips or prepare the top crust. Brush the bottom crust lightly with egg wash and let rest for 30 minutes while you make the filling.
- Plump the Cranberries: Place dried cranberries in a small saucepan, cover with rum or water, and simmer briefly. Remove from heat and steep for 15 minutes, then drain.
- Drain cherries in a strainer over a bowl, reserving the juice.
- Make the Filling: Place 1 cup of reserved cherry juice in a medium nonstick saucepan. Add sugar, cornstarch, flour, salt, vanilla, and lemon juice. Stir to dissolve. Over medium heat, stir constantly until the mixture thickens and coats the back of a spoon. Remove from heat.
- Add drained cherries and cranberries and toss gently. Let cool slightly, then carefully fill the pie shell, mounding the fruit slightly in the center. Avoid overfilling.
- Brush the bottom crust overhang with water. Assemble the lattice or top crust, trim excess, seal edges, flute, and brush with egg wash. Sprinkle coarse sugar if desired. If using a full top crust, cut vents for steam.
- Place the pie on the hot baking sheet on the lowest rack and bake at 400°F for 20 minutes. Reduce the oven to 350°F, move the pie to the middle rack, and bake another 40 minutes to 1 hour, until the crust is golden and filling bubbles to the center. Tent with foil if the top browns too quickly.
- Cool the pie on a wire rack and wait at least 1 hour before cutting so the filling can set.
- Best served at room temperature 2 to 3 hours after baking. Store covered in the refrigerator for 2 to 3 days.
- Yield: 1 (9 or 10-inch) pie


- 4-1/2 cups sifted all-purpose flour
- 2 tsp salt
- 2 tsp sugar
- 12 oz (3 sticks) cold unsalted butter, cut into pieces (or blend of butter and lard or shortening)
- 1/2 cup ice water (strain out the ice before using)
- 1 tsp vanilla extract for fruit pies or almond for nut pies
- 2 tsp red wine vinegar
- Using a mixer: Combine flour, salt, and sugar. Add butter and mix until the mixture is crumbly but still shows large butter pieces. A food processor works with a few pulses.
- Mix water, extract, and vinegar. With the mixer running, drizzle in the liquid and mix just until a ball forms, leaving visible medium pieces of butter. Add more water only if needed.
- Divide dough in half, form flat disks, wrap, and refrigerate at least 30 minutes. Dough may be frozen and thawed in the refrigerator overnight before rolling.
- Using a food processor: Blend dry ingredients, add shortening or lard and half the butter, pulse to combine. Add remaining butter and pulse a few times. Add water all at once and process only until incorporated. There should still be visible butter pieces. Wrap and chill 30 minutes.
- Flour the dough and rolling pin. Roll from the center outward with light strokes, rotating frequently to prevent sticking. If dough warms, chill it briefly. Roll to about 15 inches for a 9-inch pan.
- Gently roll the dough around the rolling pin and unroll into the pie plate without stretching. Fit it snugly but do not pull to fit.
- Single crust: Trim to 1/2 inch beyond the edge and flute. Chill 20 minutes before filling.
- Double crust: Leave bottom crust untrimmed, add filling, place top crust, trim to 1/2 inch beyond edge, flute, and cut vents.
- Yield: 2 (9-inch) pie crusts or 1 double-crust 9-inch pie
- Lattice top: Cut top crust into 3/4-inch strips, weave on parchment, flip onto the filled pie, trim, and flute.
Unauthorized use, distribution, and/or duplication of proprietary material without prior approval is prohibited. If you have questions or would like permission, contact the author via email: theheritagecook (at) comcast (dot) net. If you quote this material, please credit the source.
Thank you!